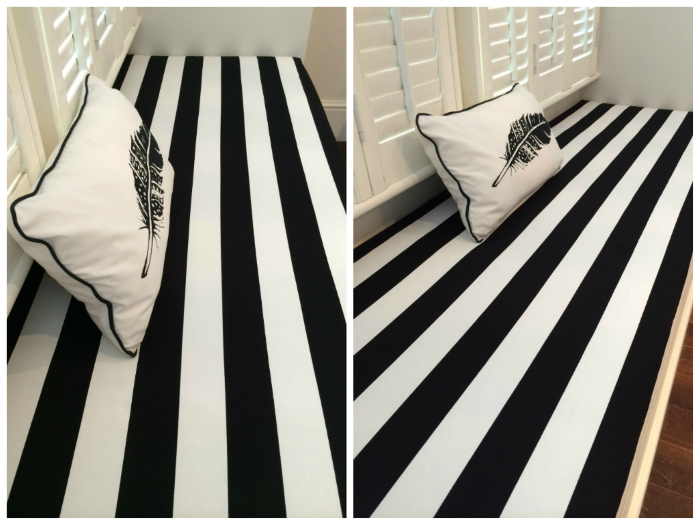
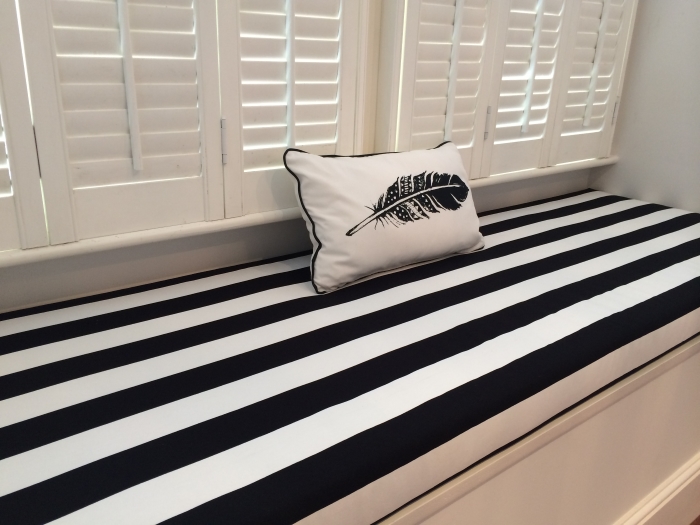
DIY: NO SEW BAY WINDOW SEAT CUSHION
Window seat cushions turned out to be one of those things that shocked me in terms of how expensive they are! The cheapest quote I got was over £200 excluding fabric (the previous owners spent £600 on theirs…)! So in true ling yeung b spirit, I decided to make my own, without a sewing machine.
It was a bit of a trial and error experience, and I sort of made it up as I went along. I’m sure there are many ways to do this (better), but here’s how I made mine…
Materials:
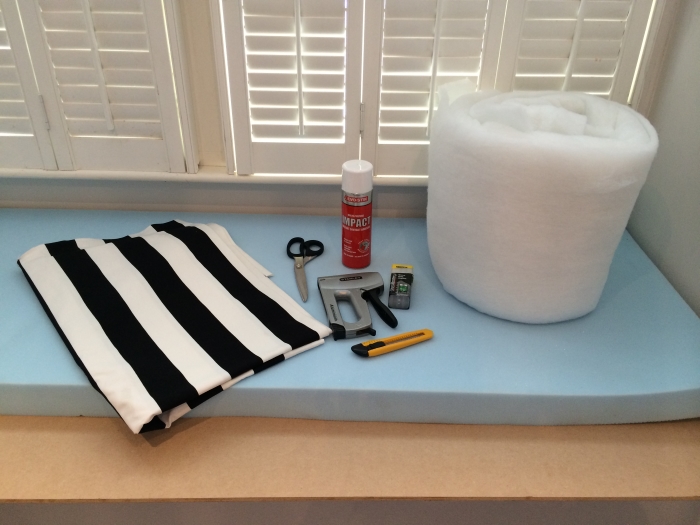
- Fabric (mine’s the Sofia from Ikea)
- Batting (also known as wadding or by the brand name Dacron)
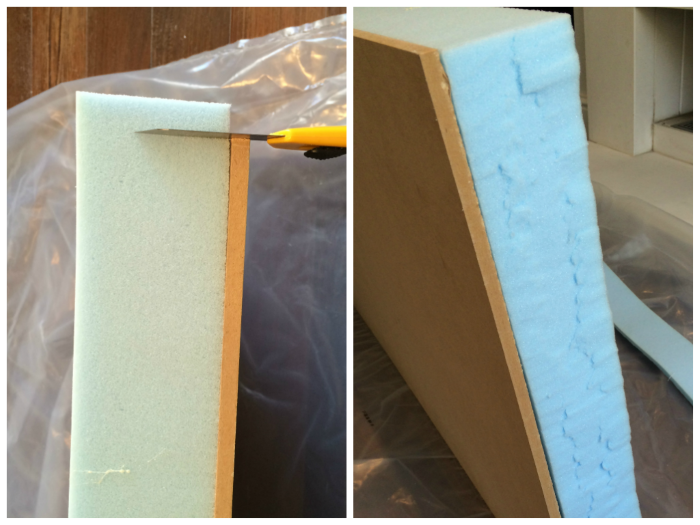
- Foam (I got a high density 3” foam from eBay)
- MDF or plywood board (I used a 9mm MDF board from B&Q)
- Scissors
- Box cutter or knife
- Measuring tape
- Spray adhesive (or all purpose glue)
- Staple gun
- Staples (I photographed 14mm ones here but found the 12mm worked better)
Step 1: Get all the sizes right!
My bay window box is a little over 80” x 25”, so I had B&Q cut the MDF board to 80” x 25” which should in theory leave me enough room for the thickness of the fabric and batting. Unfortunately, when I got home, I realised that the box isn’t quite perfectly rectangular, so I ended up sending the hubs back with the board to have another inch cut off the length!
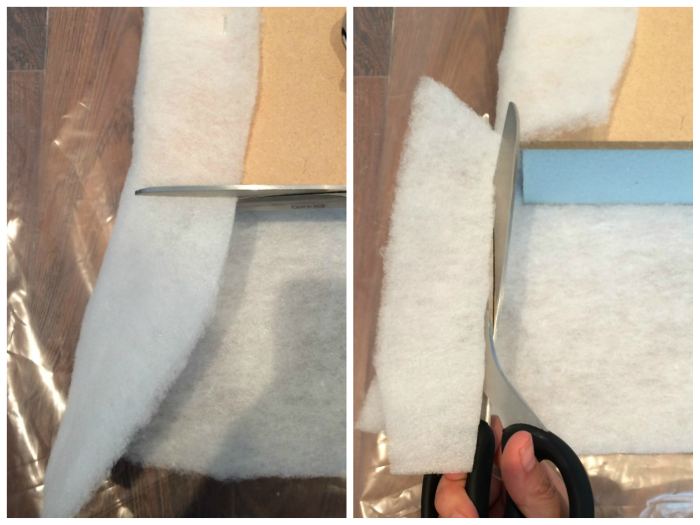
The foam needs to be the same size as the MDF board. Since I had to cut an inch off the board, I ended up having to trim the foam by an inch as well with a box cutter. As you can see in the photo, the cut is quite lumpy, but this won’t matter as the batting will hide any imperfections!
For your chosen fabric and batting, as a minimum, you want to be able to wrap the entire top plus the sides of the foam, plus an additional couple of inches of the bottom edges. So in my case, I needed:
Length - 80” + 2 x 3” (height) + 2 x 2” (bottom) = 90”
Width - 25” + 2 x 3” (height) + 2 x 2” (bottom) = 35”
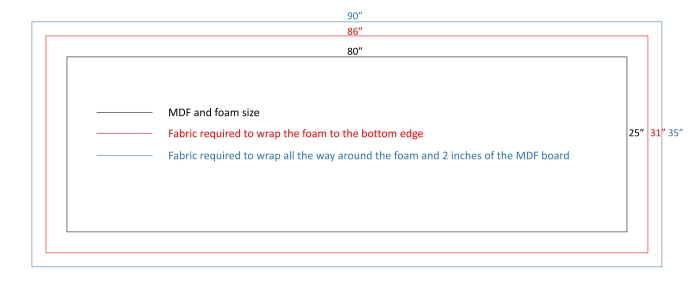
But the piece of fabric I had was actually the perfect size to wrap the whole thing so I just left it as it was.
Step 2: Protect the surface you’re working on and spray the adhesive onto one side of the MDF board (follow the instructions on the can e.g. wait for 1 minute for the glue to become tacky) then carefully align the foam along the edges. Press down when you’re happy with the alignment.
Step 3: Lay the batting flat and place the foam and board, foam facing down, in the middle. Tightly wrap the batting around one edge and (this is the fun part!) staple it onto the board roughly every couple of inches apart.
Corners are a little tricky. I did some research and found a couple of different ways to do this, but the OCD person inside me decided to trim the rectangle that’s overlapping the material below so I can get a straight, smooth edge.


Repeat until all 4 sides are stapled down.
Step 4: Iron the fabric if necessary and lay it flat, pattern facing down. Place the wrapped foam and board in the middle, batting facing down. Tightly wrap the fabric around one of the long edges and again staple every couple of inches along the board. Repeat for the other long edge.
This time, for the corners, instead of trimming the fabric, I used my present wrapping skills!

Like I said, I’m sure there are better ways to do this, but hey, it looks pretty good to me! Obviously, the downside is that the cover isn’t really removable, but I figured I can always take it off, wash it, and re-staple it back together if need be!